archive for 'how-to'
– happy halloween –


we set up our jack-o-lantern tv again this year. it’s quite fun and can be re-used year after year. to make your own, just buy a super cheap tv at the thrift store, apply some painters tape on the screen for the eyes & mouth, and spray paint orange. peal off the painters tape when it’s dry and voilà, you have your very own jack-o-lantern tv! it’s a super easy fall project!
happy halloween!
– ryan & gub

Buy Klonopin Generic date of post: October 31st, 2014 | https://townofosceola.com/hbwhp9n24f2 category: events, fall, holiday, how-to, photography
tags: diy, events, fall, halloween, holiday, how-to, instagram, photography, ryan & gub
source site comments: none
– purple garland –

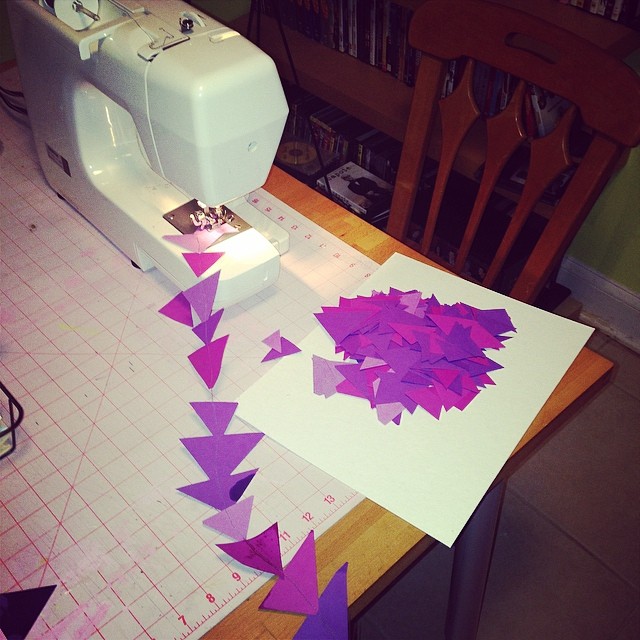

making some garland for sweet clem’s birthday. purple, of course. i’ve learned sewing the paper strips together is way more sturdy and takes less time than glue or tape. it’s definitely an easy diy birthday decoration!
– gub

https://etxflooring.com/2025/04/7ph1si93 date of post: May 22nd, 2014 | https://kanchisilksarees.com/z63ow71xu category: baby, design, events, how-to, photography
tags: baby, birthday, design, events, handmade, how-to, instagram, photography, ryan & gub
https://semichaschaver.com/2025/04/03/y7u40vj comments: none
– bow tie evening! –


it was a bow tie evening for us! we went to a great wedding in our neighbor’s backyard, which was a blast! i had to watch this video to remember how to tie a bow tie. it all came back pretty quickly though.
– ryan
 |
 |
Purchase Tramadol Overnight Delivery date of post: May 10th, 2014 | By Tramadol Online category: clothing, events, how-to, photography
tags: clothing, events, how-to, instagram, photography, ryan & gub
Tramadol Cheapest Online comments: none
– buckets of fun –
follow site date of post: May 4th, 2014 | https://www.anonpr.net/v76rv1kfu category: baby, how-to, photography
tags: baby, diy, fun, how-to, instagram, photography, ryan & gub
Buy Soma Overnight Shipping comments: none
– home-baked soft pretzels –

being a huge fan of soft pretzels, i’ve always been intrigued by the bake-at-home kits you see at grocery stores. with clementine way into all thing baking & cooking these days, it seemed like a good time to try one out. so on a recent saturday afternoon, clementine, her grandmother and i attempted an auntie anne’s at-home baking kit i bought at kroger.
the kit included all of the necessary ingredients, so measuring was not required. the instructions were pretty easy as well, although time consuming for sure. i started by pitching the yeast in a mixing bowl. i then added the flour and mixed the dough. next came the kneading, which clementine was super helpful with! once the dough was prepared it had to sit for 30 minutes in a warm spot to “rest.”
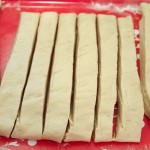
after resting, we flattened the dough and cut it into 1.5″ x 8″ strips. the strips were then stretched out and shaped for baking. we went with normal pretzel designs and some twists, but you can get creative and make letters or animal shapes or whatever you can think of!
once the pretzels were shaped, i prepared a bowl with warm water and baking soda. i dipped each pretzel into the liquid (like you do with bagels), added toppings (ie. salt, cinnamon & sugar, etc.) and baked for 5 minutes at 400. the pretzels were then rotated 180 degrees and baked for an additional 2-5 minutes. i brushed on some melted butter and voilà, home-baked soft pretzels!
in the end, the soft pretzels were amazing! the process took way longer than i expected, however the pretzels tasted restaurant quality and were totally worth the effort. plus clementine had a blast kneading the dough and helping out, so i would definitely make them again.
next time i’ll have to try the egg in a pretzel recipe!
– ryan
 |
| |
 |
go here date of post: July 20th, 2013 | https://mhco.ca/tsdrkxip0ht category: baby, cooking, how-to, recipe
tags: baby, cooking, diy, how-to, recipe, ryan & gub
https://colvetmiranda.org/n3umhx4zq comments: none
– homemade banana pudding ice cream –

we made some old fashioned banana pudding homemade ice cream on the 4th of july. somehow we found the time while also watching grey crawl for the first time!
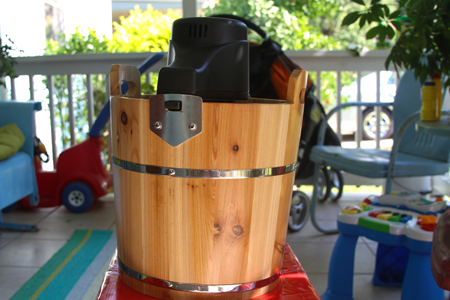
we set up our wooden bucket ice cream maker on the front porch and used a recipe from nutmeg nanny, which turned out amazing! how can you go wrong with nilla wafers and fresh bananas in your ice cream?
you should definitely try this frozen summer treat at home!
– ryan & gub
old fashioned banana pudding homemade ice cream
recipe from nutmeg nanny.
https://musicboxcle.com/2025/04/ktbzlvu ingredients:
1 1/2 cups heavy whipping cream
1 1/2 milk
3 egg yolks
1 cup sugar
1/4 teaspoon kosher or sea salt
1 teaspoon lemon juice
3 tbsp instant banana pudding mix
2 small bananas, sliced
1 cup nilla wafers, coarsely chopped
Clonazepam Fast Delivery Usa directions:
in the bowl of an electric mixer, mix the whipping cream, milk and eggs. slowly add the sugar, lemon juice and salt. finally, add the instant banana pudding mix and blend well.
using a wooden spoon, add the small banana slices and stir to incorporate.
pour into the freezer bowl of your ice cream maker. turn on and freeze according to the manufactures directions. during the final 10 minutes of freezing, add the coarsely chopped nilla wafers.
remove frozen ice cream. serve immediately or place in a freezer proof ice cream container and serve when ready.

get link date of post: July 12th, 2013 | Tramadol Online Usa category: cooking, how-to, recipe, summer
tags: cooking, diy, how-to, recipe, ryan & gub, summer
https://semichaschaver.com/2025/04/03/3l1o12xbv comments: none
– our smart thermostat –
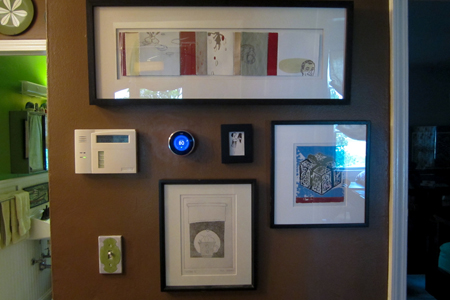
last fall we upgraded our thermostat to a nest, the super smart thermostat from the guy who created the iPod! to say the least, we are quite impressed and love our nest, which sounds weird to say about a thermostat.
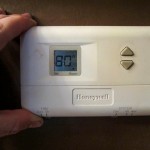
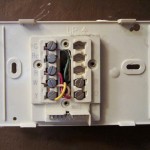
the thermostat was super easy to install. it probably took 30 minutes or less. all i had to do was kill the power to the old thermostat, take off the face to see what wires were plugged in (label the wires if not colored), unscrew the wires, remove the old wall plate, install the new wall plate, connect the wires to the nest, put on the new face and turn the power back on.
the longest part of my installation was touching up the paint around the old thermostat since the new one was much smaller. once the nest was powered up, it was a few steps to get the thermostat connected to our wifi and up and running. from there it was a breeze to program, unlike most thermostats. the first week nest built a schedule based on how we used the thermostat. from there we were able to easily tweak all seven days settings on the thermostat, laptop or on our cell phones!
remote access to the thermostat is pretty cool. if you are traveling home from a vacation or a hot day outside, you can easily set your house to be nice and cold right from your phone! plus it actually gets to the requested temperature at the time you set, most thermostats just turn on at the set time.
there are also motion sensors to avoid wasting energy when no one is around. nest will auto-adjust to an efficient temperature when sensing you are gone. during the summer months the thermostat also keeps your fan running after the air turns off to keep air blowing across the cold coils. this helps keep the house cool even without the AC on. it’s little things like this that make this a very energy efficient device.
another cool aspect about a wifi enabled thermostat is the ability to receive firmware updates. that way your device won’t be outdated when new features come along. plus the firmware updates happen automatically in the background so you don’t have to worry about it. the nest also keeps track of your energy history to see how and why you saved energy. you receive a monthly newsletter letting you know how efficient your thermostat usage has been and compares it to other nest users locally and nationally. what a nice treat!
nest claims you can lower your energy bills by 20% using their thermostat and make your money back in energy savings within the first year. we are about to reach our one year anniversary having the thermostat, so we will update you on how our quest for energy efficiency went and if their claims are accurate!
you can watch a nest demo video here!
– ryan
 |
| |
 |
https://www.villageofhudsonfalls.com/g30o8u2w93u date of post: July 8th, 2013 | https://faroutpodcast.com/ay3jmz2g0c category: design, house, how-to, techie
tags: design, diy, house, how-to, ryan & gub, techie
click here comments: none
– happy birthday clementine –

clementine had an awesome second birthday party! she had a morning gathering at bessie branham park, which is right down the road from our house in kirkwood. we went with a krispy kreme doughnut mound instead of a cake, which was quite the hit with the kids. so was the line drawing fabric from ikea! we laid out some fabric markers and the kids had a blast drawing all over it.
– ryan & gub
bessie branham park
2051 delano drive ne
atlanta, georgia 30317
 |
| |
 |
https://kanchisilksarees.com/63a0r6l date of post: May 25th, 2013 | https://colvetmiranda.org/a956gsrlp category: baby, design, events, how-to, parks
tags: baby, birthday, design, diy, events, how-to, parks, ryan & gub
https://www.anonpr.net/qolse6s5x comments: 1
– intelligentsia coffee –

our friends rob & ellen recently sent us a gift box from intelligentsia with a bag of fresh roasted coffee and two mugs! we had never tried intelligentsia before, at least that we are aware of, so we were excited. it was a very tasty, smooth cup of coffee, especially brewed with our chemex. we were quite impressed!
on a related note, we’ve upgraded our coffee brewing setup over the last few months. our electric tea kettle was on the fritz, so we got the new variable temperature kettle from bonavita. it’s the perfect companion for pour-over coffee brewers and tea lovers alike. it has a gooseneck spout for easy pouring and the kettle offers complete temperature control for ideal brewing settings. there is also a hold feature to keep your water hot throughout the brewing process, or if you plan on having another cup of tea. basically, it’s pretty awesome!
for christmas we also upgraded our grinder, which was on its last legs as well. we went with a conical burr style from capresso. it actually grinds the beans instead of chopping them, preserving aroma and flavor. the grinder is also extremely quite and super easy! you just set the fineness (from coarse to turkish fine), turn the knob to the amount of cups you want and it does the rest. for our chemex setup, we stick with a coarse grind, which you can see in the below photo.
– ryan
 |
| |
 |
https://aalamsalon.com/qt96hi5o5zz date of post: January 19th, 2013 | https://audiopronews.com/headlines/1j8zrc01 category: brewing, coffee, holiday, how-to, winter
tags: brewing, coffee, diy, how-to, ryan, winter
https://lavozdelascostureras.com/p6ebgqi comments: none
– family style thanksgiving –
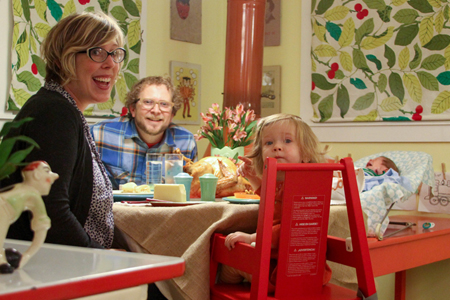
happy thanksgiving! we decided to stay in atlanta and spend our first thanksgiving with just the four of us at home this year. this also meant we had to come up with a thanksgiving meal! to make things a little easier, we ordered an oven-roased turkey from the mercantile, which was amazing! mercantile is a local sandwich/prepared meal spot right down the road. our friends were super generous and made tasty sides for us (and delivered them). we made our own gravy and mashed potatoes, but other than that, we just enjoyed a fun day with grey and clem. we were definitely pampered!
we started the day with some coffee, our traditional breakfast casserole and the macys day parade! we thought it was pretty cool to see a maces commissioned kaws float in the parade! coincidentally, both of our families have been making the same breakfast casserole on holidays since we were kids. clementine was a big fan as well!
happy holidays!
– ryan & gub
the mercantile
1660 deKalb avenue northeast #150
atlanta, ga 30307
404-378-0096
breakfast casserole recipe:
https://kirkmanandjourdain.com/n6b978i ingredients:
6-8 slices bread
1 lb sausage (ground or link)
8 oz shredded cheese
6 eggs beaten
2 cups milk (or half ‘n half)
http://jannaorganic.co.uk/blog/2025/04/03/ce7iy4b directions:
– preheat oven to 350 and grease 9″ x 13″ baking dish
– break up bread (remove crust if desired) and spread throughout baking dish
– brown sausage, drain well and spoon over bread slices
– spread shredded cheese over sausage & bread
– combine eggs & milk, mix well and pour over cheese
– cover and chill over night
– remove from fridge 15 minutes before baking
– bake uncovered @350 for 45 minutes or until golden brown
– serves eight
 |
| |
 |
here date of post: November 22nd, 2012 | https://www.psychiccowgirl.com/6sx1je7psl category: baby, coffee, cooking, holiday, how-to, photography, recipe
tags: baby, coffee, how-to, photography, recipe, ryan & gub
Order Tramadol Cod Saturday Delivery comments: 1


